Last week I posted blog posting number 250 and promised some blog candy for one lucky blog follower. Congratulations to Carrie Kemp. I will have a parcel of goodies out to you soon.
And now for an apology. Alas there may be a few gaps between posts for a wee bit. My laptop has finally given up the ghost and I've been forced to borrow my hubbies (when he will let me lol). I knew she was on the way out... my IT tech man had told me this, though I was kind of hoping she would last until the new year. Alas it wasn't meant to be.
So until I can afford to replace my dear, departed laptop, I'm not sure how often I will be able to post. I will try my best as I really do enjoy sharing my creations with my friends.
All the best, Paula.
P.S. The Christmas Craft Challenge will still go ahead this year, one way or another... she says hopefully!!!

Showing posts with label Giveaway. Show all posts
Showing posts with label Giveaway. Show all posts
Sunday, October 21, 2012


Monday, April 23, 2012
Give aways
With a couple of posts about my creations over the last week or so I've promised a give away to a lucky commenter. The close off date was yesterday, so it's time to announce who are the lucky recipients of some of my creations.


Journal Spots - go to Lainie
Dress Form Tag - goes to Bern

In addition I will be sending a template of the dress form to my good friend Miss Wendy as she asked so nicely and I am more than happy to oblige.
I hope everyone enjoys their little gifts from me to you with love. I will get these in the post this week.
Sunday, April 15, 2012
Journal Spot Swap
I know I seem to be doing a lot of swaps at the moment but to be honest, I'm quite enjoying them. I love that they are small, quick and I can create them in a production line. And when you are not really feeling very crafty they are great for reminding yourself how crafty you really are.
For this swap we had to create three journal spots, each with a Shabby Chic/Vintage style. I love these styles, though they are not really my usual scrapping style, so I sometimes struggle with them. I think much of my problem is my dislike of anything too pastel. That and I'm too much of a perfectionist and I dislike most things I create. Who doesn't think something could be better?
The guidelines said a) 3" b) 3 1/2" c) 4" and I loosely followed this.
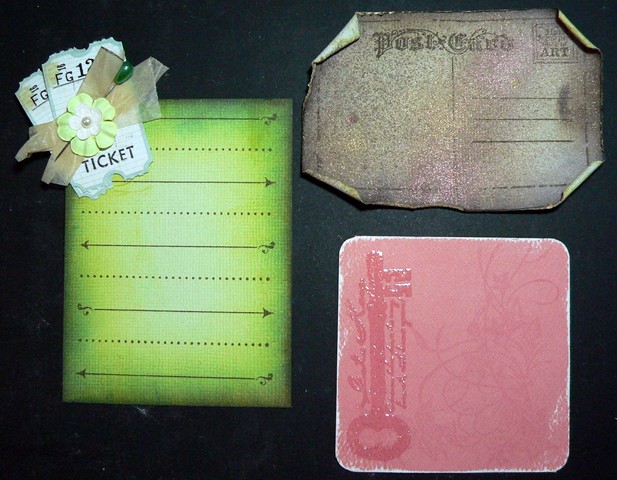
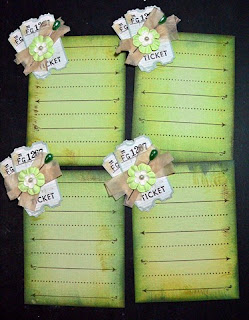
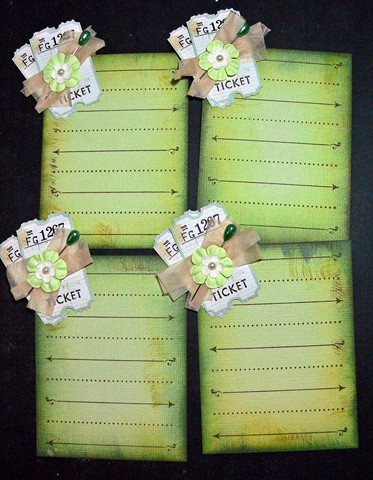
Here are the finished journaling blocks with one of each for each participant.
And here is how I created each block:
Green Ticket Journal Spot:
 Cardstock base in Celery cut into 4" x 3" rectangles
Distress the edges using Tim Holtz Distress Inks (in order) Crushed Olive, Faded Jeans and Walnut Stain. As I add each layer of distress ink I move less into the middle of the cardstock so you can see some of the previous layer of distress ink.
Stamp Hero Arts KEC28 Write Your Message stamp centred across the journal block using Walnut Stain Distress Ink.
Layer 2 tickets from Pink Paislee Parisian Anthology - Tickets, slightly off centre of each other. Pin together 2 strips of tissue paper from fabric pattern (1" x 2") and layer across tickets. Add Paper Flowers layered with a medium pearl. Adhere embellishments over top left corner.
 Brown Postcard Journal Spot:
 Grey cardstock cut into 4" x 2 3/4" rectangles
Distress the edges using AMM Caramel Paper Stain followed by Tim Holtz Distress Inks Stormy Sky and Walnut Stain. I applied the Distress Inks in a similar manner to the green journal spots.
Stamp Inkadinkado 94012 Postcard stamp centred across the journal block using Walnut Stain Distress Ink.
Distress the edges all around the journal block using an edge distresser.
Spritz the cardstock liberally with water using a mister/spritzer bottle. This will tone down the ink considerably and make the cardstock more pliable. Using your finger tip, roll the edges and corners to give a weathered look. Leave to dry or dry with heat tool.
When completely dry mist lightly with Tsunkineko Walnut Ink Antiquing Solution (Liquid), Tattered Angels Glimmer Mist Suede and Coffee Shop. Dry thoroughly with heat tool.
 Salmon Key Journal Spot:
 Trim Salmon cardstock to 3" x 3" square then use corner rounder on each corner.
Lightly sand the cardstock to reveal the white inner core and distress the cardstock.
Stamp larger flower corner stamp from the KaiserCraft Chapter One stamp set using Versa Mark watermark stamp pad.
When the ink is dry wipe the journal block with a Clear Images Pad then stamp Key stamp (Limited Edition Rubberstamp 650-594-4242) with embossing ink. Cover generously with Stamp It Embossing Powder in Polysparkle. Heat with heat tool to process embossing powder.
 I really love the way that all three journal spots turned out. I also love that I was able to use colours I love and use all the time and yet still create a look that I think fits a Shabby Chic / Vintage theme.
Once again I created an extra set of the journal spots, so I will give this away to another lucky person who leaves a comment on my blog. Cut off date for comments Sunday 22 April so be sure to leave a comment to go into the draw for a set of adorable journal spots.
For this swap we had to create three journal spots, each with a Shabby Chic/Vintage style. I love these styles, though they are not really my usual scrapping style, so I sometimes struggle with them. I think much of my problem is my dislike of anything too pastel. That and I'm too much of a perfectionist and I dislike most things I create. Who doesn't think something could be better?
The guidelines said a) 3" b) 3 1/2" c) 4" and I loosely followed this.
Here are the finished journaling blocks with one of each for each participant.
Green Ticket Journal Spot:
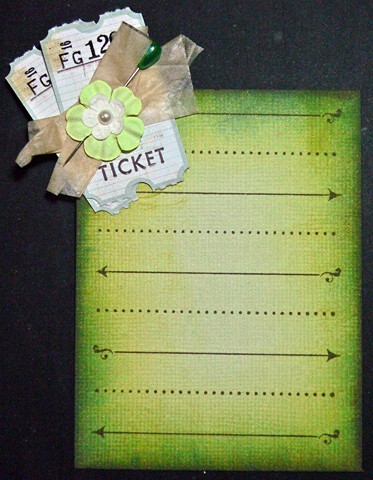
Distress the edges using Tim Holtz Distress Inks (in order) Crushed Olive, Faded Jeans and Walnut Stain. As I add each layer of distress ink I move less into the middle of the cardstock so you can see some of the previous layer of distress ink.
Stamp Hero Arts KEC28 Write Your Message stamp centred across the journal block using Walnut Stain Distress Ink.
Layer 2 tickets from Pink Paislee Parisian Anthology - Tickets, slightly off centre of each other. Pin together 2 strips of tissue paper from fabric pattern (1" x 2") and layer across tickets. Add Paper Flowers layered with a medium pearl. Adhere embellishments over top left corner.

Distress the edges using AMM Caramel Paper Stain followed by Tim Holtz Distress Inks Stormy Sky and Walnut Stain. I applied the Distress Inks in a similar manner to the green journal spots.
Stamp Inkadinkado 94012 Postcard stamp centred across the journal block using Walnut Stain Distress Ink.
Distress the edges all around the journal block using an edge distresser.
Spritz the cardstock liberally with water using a mister/spritzer bottle. This will tone down the ink considerably and make the cardstock more pliable. Using your finger tip, roll the edges and corners to give a weathered look. Leave to dry or dry with heat tool.
When completely dry mist lightly with Tsunkineko Walnut Ink Antiquing Solution (Liquid), Tattered Angels Glimmer Mist Suede and Coffee Shop. Dry thoroughly with heat tool.


Lightly sand the cardstock to reveal the white inner core and distress the cardstock.
Stamp larger flower corner stamp from the KaiserCraft Chapter One stamp set using Versa Mark watermark stamp pad.
When the ink is dry wipe the journal block with a Clear Images Pad then stamp Key stamp (Limited Edition Rubberstamp 650-594-4242) with embossing ink. Cover generously with Stamp It Embossing Powder in Polysparkle. Heat with heat tool to process embossing powder.

Once again I created an extra set of the journal spots, so I will give this away to another lucky person who leaves a comment on my blog. Cut off date for comments Sunday 22 April so be sure to leave a comment to go into the draw for a set of adorable journal spots.
Friday, April 13, 2012
Dress Form Tags and a Give Away
Dress forms, in all forms, are very much in vogue at the moment in scrapping. They hark back to the by-gone days of home sewing when mum would make clothes at home because they were to expensive to buy them from the shops.


They remind me of my mother teaching me to sew without a pattern, or by meshing two completely different patterns together, without tailor's tacks and basting and all very much to my sewing teacher's disgust.
I've never had a dress form though a few years ago I did buy a wire display form I bought so I could display all my ribbons (before anyone else thought it was a great idea) but which I have yet to add a single ribbon to. My friend Glenna bought me a matching mini dress form for my 40th... which is also just so cute... but once again I digress.
Last month I signed up for a dress form tag swap and then promptly forgot all about it completely... I'm sure my head isn't screwed on properly at the moment.
I saw some of the pictures others in the swap have posted, and thought to myself, "ohhh they are gorgeous, wish I was doing that swap." Then two days before the posting date I checked and low and behold there's my name on the list of participants. Oh bugger!!! Okay, let's not panic.
I calmly went down to the studio, looked at my dress form templates and chipboard die cuts and said to myself... "okay self, now what?"
All the other pictures showed dress forms attached to standard luggage tags but I decided to be different (no surprises there)... instead of attaching my dress form to a tag, I decided my tag would be the shape of a dress form. My logic was... I didn't have enough dress form chipboard die cuts of the same style for the size of luggage tag I had and the size I did have enough of, just looked too small against the tag. The template I had was also the size of the luggage tag so it really didn't make sense to then attach it to a tag which would virtually disappear completely. Hence... the approach I took.
So what did I do... (Sorry as it was a bit of a rush I forgot to take photos as I was speed scrapping to get them done before my trip down to Christchurch).
- Traced around my template onto some recycled ice-block boxes
- Cut out the dress forms by hand... if I had a die cut of a dress form I would have used that as it would've been much quicker but I don't so I went retro style!
- Coloured the plain side of the dress forms using AMM - Caramel and Chocolate Paper Stain; and Tim Holtz Distress Inks - Mustard Seed, Vintage Photo and Fired Brick.
- Stamped the all the dress forms with a collage of three small stamps - Making Memories - Great Escape - Icons, and two freebies from a magazine. I put all three stamps on the one block which made life so much easier. I used the Tim Holtz Walnut Stain Distress Ink for the stamping.
- Spritzed the dress forms with Tattered Angels Glimmer Mist - Gold, Suede and Coffee Shop.
- Adhered scrap cardstock onto the back of the dress forms, let the glue dry then trimmed the backing to shape. Next time I would do this step after the next step instead of before so as to hide the sewing.
- Punched holes along the hem of each dress form then hand beaded fringing using embroidery thread with seed beads and bugle beads.
- Adhered feathers (pulled off large black feathers keeping intact as much as possible) using glue dots. Each dress form has two feather clumps - one pointed up, the other down.
- Misted some KaiserCraft Mini Paper Blooms (Buttercream) with Gold Tattered Angels Glimmer Mist, then attached using Elmer's Glue across the join in the feathers.
- Adhered KaiserCraft self adhesive gold rhinestones to form necklace.
I love that each of them is different.
I love the way the glimmer mist muted the stamps images to make them look very vintage.
I love the colour scheme - but then I am an Autumn colour girl. (I have to say the photos just don't do them justice. In real life they are so much richer and warmer with more depth.)
I love the simplicity yet stylishness of the finished look.
I love the timeless look that can go with any theme of a layout.


I created these so that they can be added to a layout either as they are or with extra ribbon, flowers, bling extra added to blended them into the theme of the page.
Give Away -
I also created an extra one, so I will be giving this away to one lucky person who leaves a comment on this post. Let me know where or how would you like to use the tag if you were to win it and I will draw one lucky person to receive it. You have until Sunday 22 April 2012 to leave me a comment.
Subscribe to:
Posts (Atom)