Showing posts with label Journal. Show all posts

Saturday, February 21, 2015

Art Journal - Illustrated Alphabet - B is for Background

If you've just arrived at my blog having watched my new video on YouTube... hello, hello, hello. You're either here to know what are the 22 mists/sprays that she used on this page or you want to know... did she really use 22 different mists/sprays on this page or was that an exaggeration?
The answer to all these questions and more is further down the page... but please don't skip down straight away, you might miss something interesting.
If you've arrived at my blog because you follow it or you stumbled onto it by some random twist of fate then welcome, welcome, welcome. If you haven't checked out my video, then you really must as it shows you how I created this art journal page,  albeit at a great rate of knots.
I'm typing this up while I wait for the aforementioned video to upload to YouTube... I call it multi-tasking... and as it just takes so long to upload it's also a boredom prevention for me at least.
This week's page was "B" for Background. If you think the page looks unfinished, and I totally respect your assessment if you do, then that's okay. To some extent I agree with you. I could have done a lot more, even just a few more things to finish it off... but, having said that, I also disagree on the grounds that because the page is all about "backgrounds" then that is what I wanted to show and I didn't want a lot of embellishing to over power the back grounds... they are after all the "stars" of the page.
The page was created over a couple of days as I allowed for some drying time overnight, particularly for the moulding/texture paste to dry. As much as I just love my heat tool, I do find that with texture paste all it tends to do is bubble up when you try to force dry it. I have used this to my advantage on earlier art journal pages to give me some puffy looking circles I had wet embossed onto my project but in general it's not something I tend to create all that often. I also tend to take my time when I'm creating so I can enjoy the process. I know I will never win any speed creating prizes, cos that's just not my style.

So let's get down to business...

Products Used:
  • Pre-gessoed page (Faber-Castell Gesso)
  • Die-cut Chipboard "B" approximately 6" x 3 1/2"
  • UmWow Studio - Star Confetti
  • Faber-Castell Whipped Spackle
  • Liquitex Matte Gel
  • Lindy's Stamp Gang Magical - Tiffany's Blue
  • Pearl Ex - #685 - Spring Green; #686 - Turquoise; #687 - True Blue & #688 - Misty Lavender
  • Lindy's Stamp Gang Mists
    • Flat Fabio - Danny Zuko's Denim (1)
    • Starburst - Tibetan Poppy Teal; Screamin' Banshee Black; Hydrangea Blue; Whale Watch Blue; Sea Grass Green; Freaky Franken-Lime; Ponderosa Pines Olive; Tiffany's Blue and Lucky Shamrock Green (9)
    • Moonshadows - Ethereal Emerald; Gossamer Gold; Buccaneer Bay Blue; Mystic Malichite and Tawny Turquoise (5)
  • Prima Color Bloom - Lime Wedge; Summer Sky and Storm Cloud (3)
  • Heidi Swapp Color Shine - Chartreuse (1)
  • Tattered Angels Glimmer Mist - Gold and Monster Mash (2)
  • Tim Holtz Adirondack Color Wash - Stream (1 - total 22)
  • Tsukineko - Versamark Ink Pad
  • Donna Salazar's Mix'd Media Inx Embossing Powder - Denim
Tools Used:
  • Mechanical HB Pencil
  • Palette Knife
  • UmWow Studio Mask/Stencil - Star Confetti Mask
  • Cake/Clay Modelling Tools
  • Small head and large head paint brushes
  • Heat Tool
  • Tweezers
  • Upsy Daisy - Joyful Jots Acrylic Stamp Set
Process Steps:
As soon as I had decided my theme would be background techniques, I knew I wanted to create a page that showed off a number of very distinct and very different styles / techniques but with a cohesion to the overall look of the final page. I decided that the best way to "blend" the various styles would be to blur the edges between one technique and the next rather than leave them in distinct boxed areas. The second key tool to creating a cohesive look would be my use of colour to draw the various components into one complete unit and my all-time favourite way to add colour, is to use mists and sprays. 
  1. Starting with my pre-gessoed page, I aligned the chipboard "B" on the page and drew around the edges so I knew where I could and couldn't add texture to my page.
  2. Starting in the bottom left corner (using the visual heavier weight to anchor the page), I started to randomly adhere pieces of the chipboard Star Confetti using the matte gel. I started with the larger pieces first then gradually selected smaller and smaller pieces adding them between the larger pieces as well as "fading" out from the heavier centre of the chipboard area in the corner of the page.
  3. In the top right hand corner I then added some more stars using the coordinating mask/template - Star Confetti with some whipped spackle. This was a little bit trickier to stay outside of the "B" shape, so I did have to clean up a little over flow so that it didn't impede the chipboard "B"'s ability to lie flat.
  4. In the top left hand corner I spread some whipped spackle out with my palette knife then I drew wavy lines into it to create texture reminiscent of tree bark or vines. The inspiration for this technique came from Aaron on his YouTube Channel - Imperfect Impulses. I made sure to bring this right down the page to inter-weave the pattern amongst the upper-most stars which I had purposely left more open than further down the page.
  5. In the final corner I wanted to experiment a little with pre-colouring some of the whipped spackle. I put a generous couple of scoops into a small resealable container then added some colourants - magical and pearl ex powders being mixed together to try to get the perfect colour. Side note - although the colour was quite nice, it just wasn't what I wanted (not that I really knew what I wanted). Rather than keep blending for the sake of experimenting, I decided to settle for the colour created - for the time being.
  6. I spread some of the tinted whipped spackle onto the remaining space around the "B". Using a icing/clay moulding tool with fine corrugations on it, I created a series of peaks and valleys which kind of swirled from one point out in slightly different directions. I think it looks almost like the veins of a feather, not the fluffy ones, but the slick, flat feathers that kind of look fused together.
  7. At this stage I left all the gel and moulding paste to dry overnight.
  8. I wasn't happy with the intensity of colour in the tinted moulding paste, so I added some more of the magical and pearl-ex in small patches across the tinted area then using a small brush I spread the colour across the surface making sure to get the additional colour both in the valleys and peaks of the surface. I then dusted off any excess with a large soft headed brush. Much better and the shimmer considerably more visible as well.
  9. Step 9 is the colouring of the page and through it's just listed as one step here, in reality it's a lot of little steps all rolled into one for the sakes of brevity. I did all of the rest of the colouring of the page using various mists and sprays - 22 different colours to be exact. Do you have to use that many - no. Use what you have and what you like. You can give the impression of having more colours than you really have, by varying the intensity of the spray that you use. Spray a lot in one area but only a little in another. Spray from different heights. Dry in between layers or mix colours while they are wet. This all combines and mixes and mashes to create a totally unique and individual look that no one else will ever be able to recreate - not even you. My first layer of colour is usually the only layer that I cover the entire piece. After that it's usually a patch or a section only. I generally also use between one and three colours before drying with my heat tool. I may cover the entire page or only a portion before I dry the colour as well. And I use my heat tool as well as tilting my page to assist with mixing and blending the colours. Just keep layering with more mists/sprays and more colours or add more of the same colours until you reach the look that you like.I have been known to add so many layers I lose count not to mention not knowing how long this step takes. The final layer is also usually a light layer across most or all of the page with either a silver or gold just to add that final touch of opulence. For this page it was a light mist of gold.
  10. Phew nearly there... last step was to add the title - "Background". I knew the fit for the alphabet stamps I was using was going to be very tight width wise. I laid them all out along the backbone of the "B" and they didn't quite fit - but only just. The only way I would be able to make it fit would be to ink and stamp each letter individually then eye-ball how much space I wanted to leave between it and the next letter. If I was using a coloured ink, not too big a deal, but as I was using a clear ink to then heat emboss, I had to create each letter start to finish before moving on to the next one. Otherwise I wouldn't have been able to get the spacing right because I couldn't see the letter I'd just stamped. Usual process for this... stamp with VersaMark ink (my ink of choice for embossing but you can use whatever you prefer). Generously sprinkle with embossing powder - usually I sprinkle directly out of the pot but I wanted a little more control over where the powder landed given there was just so much texture on this page. Using a wide palette knife allowed me allowed me to do this. Shake off the excess embossing powder and clean up the image with a small paint brush then heat set with my trusty heat tool.
And that's all there is to it. I didn't add a border to the page this time as I didn't feel it needed it and the texture is so strong that I don't think it would have actually looked right.
I love this finished page. It's very me, very much my style as far as backgrounds. And I have lots of texture myself... (If you've ever met me, you'll get what I mean LOL).
There are some photos below and of course you can see the finished product in the video, but neither seems to capture the colours how I see them in real life... not sure how to resolve this... maybe you all just need to pop on over to New Zealand to check it out yourself!!

Top left hand corner of the page. The bark / vine look inspired by Aaron from Imperfect Impulses (believe it or not). I definitely need to try this technique on a tree form to see if I can create realistic looking tree bark... challenge issued! 
Love the colour blending and striation. This also shows how two distinct techniques / styles blurred / ran together rather than being segmented by a harsh border.
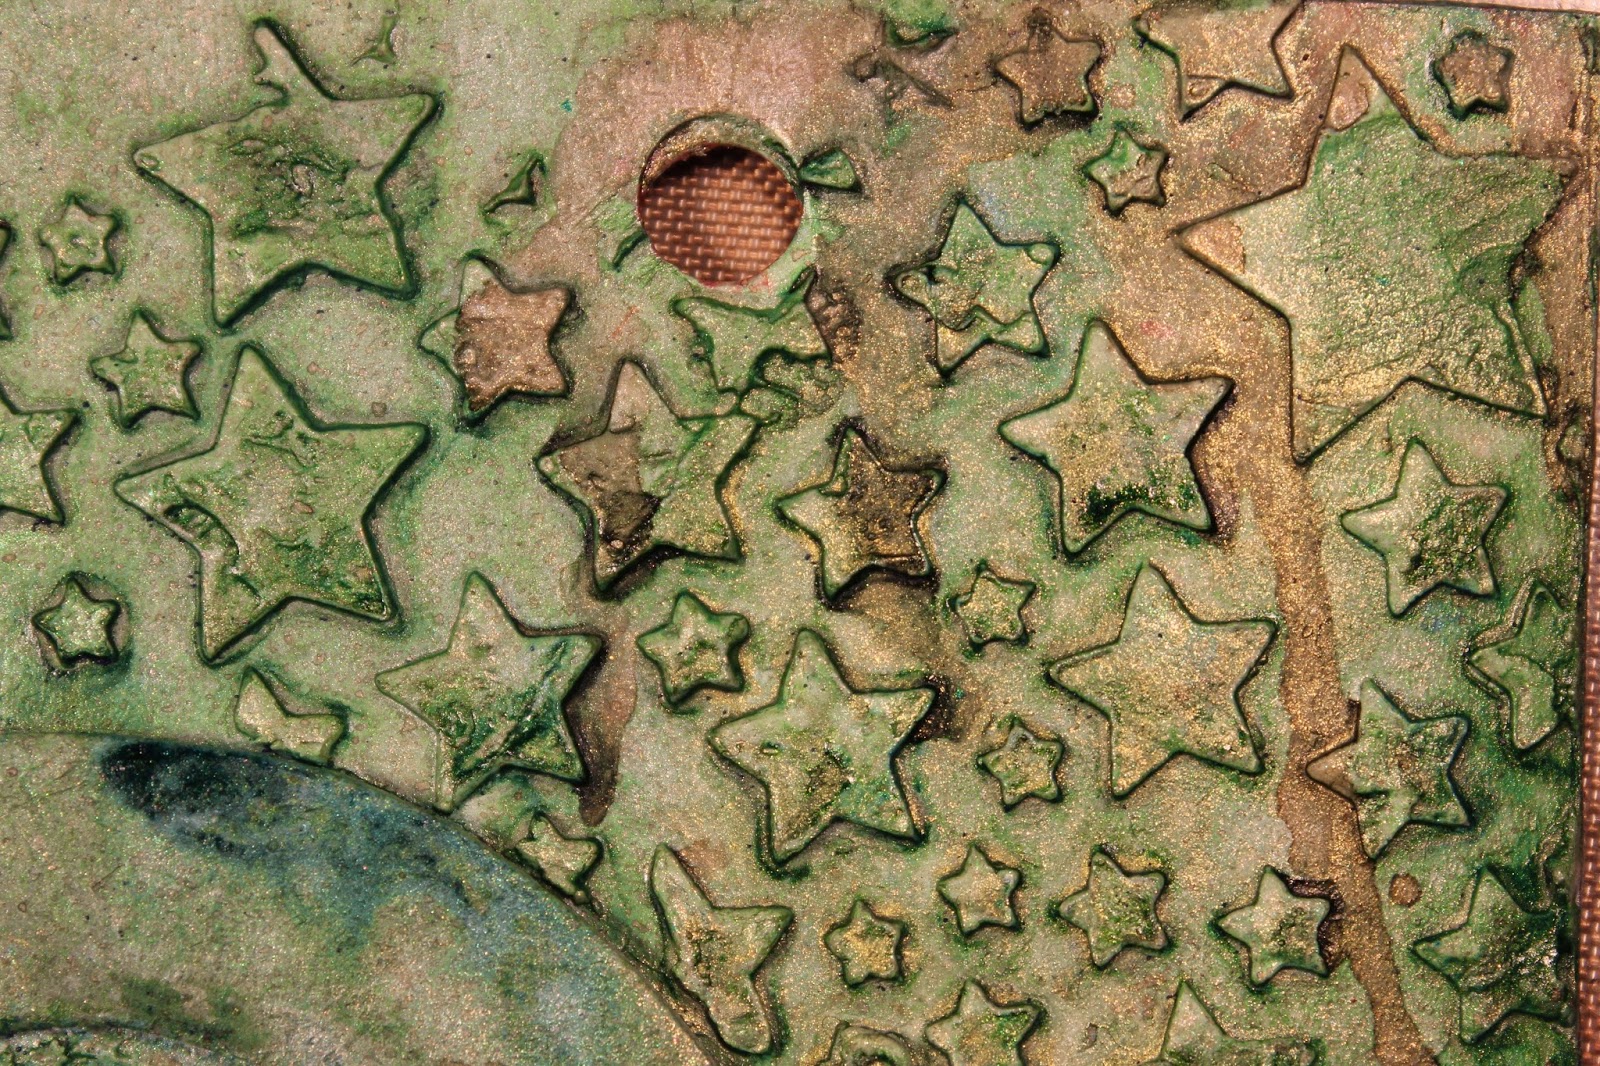
 
Stars created using mask / stencil from UmWow Studio. 
Stars created using die cut chipboard Star Confetti from UmWow Studio. This has got to be my favourite section of colouring. I love the deep, dark, moody blue-ish black look with just a hint of gold to break it up.
 This has got to be my favourite textured part of this page. I think it almost looks like a peacock feather. I'm really pleased with the way the colouring worked out. The rivulets of colour were intentional and looked even better than I expected.
Heat embossing so that the letters would stand out a little as colour wise they almost blended into the background which is what I wanted.
Love, love, love this grungey, distressed style. 
The next few photos are all about showing the dimension of the page created by the varying techniques used. It may also have been just a little of me playing with perspective when I was taking these photos.
 Hmmmm more of the delicious moody blues.
This piece looks even better from this angle. 
Love these stars. The green looks slightly warmer, more golden but still a great colour. Love me some green!! 
Considering this was merely a filler upper of a gap, I'm really pleased with the way they turned out. I had no expectations so the final look is awesome. Almost looks like craters on the moon LOL. 
Maybe another one of those mysterious perspective photos that just slipped in... 
At last the final page in all it's glory. Love it, even if I do say so myself! Just wish the colouring looked a bet closer to reality.

I do have the following products available in my online shop. Be sure to get yours before they are all gone. If you haven't already subscribed to my YouTube Channel please be sure to head over and click the button. I'd hate for you to miss out on any other pages I create for this A - Z Illustrated Alphabet Art Journal of Art and Craft Styles and Techniques.
You can also find me on Facebook, Instagram, Twitter, Pinterest and Google+.

Lindy's Stamp Gang Starburst Set - Sweet Treats - I used Tiffany's Blue from this set but the other colours in the set are equally gorgeous in their own right. I've just had some new sets arrive so these will be going up on the website this week.

Monday, June 3, 2013

Creative Adventures Downunder - Part 6 (Final)

The final US tutor we were blessed to spend time with was the incredibly talented, perpetually positive and all around nice lady - Donna Downey. We had one class with Donna, over either two or three sessions depending upon which group you were with. The Pink group were the last ones to get down and dirty with Donna's unique "hands-on" style of teaching.
This was the class I was both most looking forward to and most nervous about. Unlike many scrappers and crafters, my own exploration of mixed media crafting and art journaling had, until this class, been little more than dipping a toe in the water, so to speak. I knew who Donna was, had seen some of her videos and tutorials and knew a little bit about her product range, but boy was this class an eye opener!
I was pre-warned from people in the other classes that it didn't matter where we sat as Donna was a move about the class room kind of teacher... a plus in my book. So with all my goodies on my desk I sat patiently waiting for all the fun to start.
The first thing we had to do was pick one of Donna's signature journals to create in. These have a fabric and canvas cover, hand sewn, with the hugest big button on the front and an elastic closure to hold it all together.
The signature inside (the pages to us newbies) were a mix of Bazzill cardstock cut to size inter-mixed with tags and envelopes. All of this is held together with a coordinating ribbon threaded through some grommets in the spine. I fell in love with these lime green dots the moment I saw them. (It helped it was the only one of its kind left in the box as well!)
Opened up, these are what all the pages looked like. The Bazzill cardstock is all pre-cut to 12" x 9", so when folded in half the album size is 6" wide and 9" tall.
The first two pages we created were to compare the results of Faber Castell Gelatos on backgrounds with and without gesso. We had to chose either a warm or cool colour palette and use 2 or 3 colours from that palette to experiment with how they blended differently on the background as well. We coloured the two pages with the various shades of gelatos, then spritzed with water and blended with our fingers... time to get dirty!!
This page didn't have any gesso on it. It really soaked up the gelatos and water mix so gave a more subtle and even blending of the different tones of colour. However in doing this I found that I had to be careful not to over blend the colours as then the paper itself seemed to separate and bits were coming off into the colour mixing which I then had to remove. Of course this may have been because it was the back side of the paper as well.
This page had been coasted with the gesso. This time the gelatos felt like they skimmed across the surface of the page rather than soaking into it. This meant they also maintained their individual colours more and didn't blend as well (or as subtly) as when used on the non-gessoed paper.
The second step was to compare the difference between gesso and non-gessoed backgrounds when painted with acrylic paint. Again we had to use 2 or 3 warm or cool paints and blend them together. The above is without gesso. I did noticed the paints looked a little flatter on the non-gessoed paper than on the background that was gessoed.
This is with the gesso on the background paper. Of all the exercises this was the one I didn't really get or see any difference. I'm not sure if it was because I just didn't get it, or because the acrylic paints I used were cheap craft quality and not a good quality artist acrylic paint.
This was the next page we did. Finger painting!! Such a revelation, it was like being a kid again!
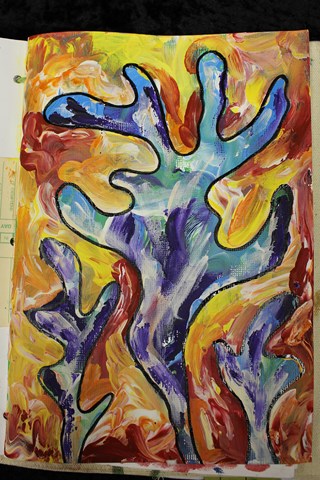
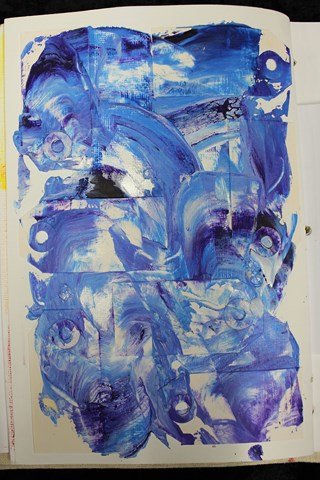
This time was finger painting with acrylic paints. We had to pick either a warm or cold palette once again. This time I went with a cold palette using light blue, green and purple together with white. Using our fingers only (quite liberating I might add), we covered the entire background page. The emphasis this time was on blending the colours to create new colours and new tones as well as a texture though the technique.
Once this layer was dry we then drew a shape or image using a 6B charcoal pencil. From the cool coloured background I had painted I could see almost like a underwater scene, so this provided the inspiration for my image. I drew some (very) abstract coral. Around the coral images I then finger painted over the top using the same technique but this time using a warm palette.
The final step (to get to this stage) was to go over the drawn lines once the paint had dried, though instead of using the charcoal pencil again, I used Indian Ink. I still haven't decided if I am going to do any more to this page or not. Part of me is saying yes it needs more, but I also really love the colours just the way they are.
The next page we did we adhered a canvas heart onto one of the pages then coloured it one colour with acrylic paint (either light or dark) and the background another colour, the opposite of what we had used for the heart. If the heart was a dark colour, then the background was light. I of course did the other, which was the harder combination for the next step... typical!!
This exercise was about how to add depth and shading/shadowing to give a three dimensional look to an image/item. Over the top of the painted areas around the inside of the heart (and outside of the heart on the background) we added the Crayola Water Soluble Oil Pastels which we blended together with a spritzing of water.
I really like the way that the texture of the canvas and the background cardstock show through the colouring and shading. I still want to work on the shading a bit, but I'm sure this will continue to develop with time.
The next exercise was to adhere some mini tags to a page. The entire page was then covered in gesso. Once this was dry we then added some blobs of paint across the page before smearing them over the page using a palette knife to highlight the texture of the background.
We then had to adhere down some string to a page and cover this in gesso as well. To add even more texture, I tied small knots along the length of the string as well. I adhered the string on both a full page as well as one of the tags (half an envelope) between two pages.
We covered each page using the finger painting method used earlier on and then highlighted the texture of the string using a complementary colour (i.e. opposite it in the colour wheel). We also used the palette knife to add some scrapes of colour around the edge of the page.
The final step was to attempt to add some additional texture using an image transfer technique to copy the text from a page of text from a book. I used a matte gel that Donna hadn't tried before, so the unsure result was untested as to whether or not it would work. Donna explained two techniques, so I gave them both a go to see which would work best. One worked... the other didn't, though even the one that worked still needs some refining.
Here is a bit more of a close-up of the image transfer. There is still the look of the paper in the image hence the need to work on this technique a bit more but I still like the way it has come out.
The final technique we tried was to stamp using one of Donna's signature stamps using the gelatos. I' stamped my image onto the inside back canvas cover of my journal. I think the key is to be VERY generous with the colour on the stamp and spritz it with water, but then having done that, you can then stamp multiple images without having to refresh the colour.
This particular class was the one that I had to buy the most new products for and I think the class that had the longest bring to class list. I know for some this was an issue (there were one or two quite vocal about it), but these did tend to be the people who felt the least comfortable about the class content. I had no problem at all buying these products and I know I will continue to use them again and again... I already have used them again.
By the end of the class I think I could safely speculate that the people in the class were polarised into one of two extremes - they either totally loved the class and couldn't wait to try more mixed media creativity or they really didn't like it and intended to never try anything like this again. I'm the type of person who believes  don't knock something until you have tried it as you never know if you will like something or not until you have actually tried it. I can safely say that thanks to the terrific teaching of the lovely Donna Downey, I am definitely a convert and I will be trying more very soon!
I had to do the obligatory photo with Donna, but to be different I wanted to take a "Dirty Hands" picture even though our hands weren't that dirty as we had both cleaned them during the class (several times). 
Thank you so much for the wonderful class Donna!!

Sunday, June 2, 2013

Creative Adventures Downunder - Part 5

The second big name tutor over from the US for the Creative Adventures Downunder Event 2013, was Teresa Collins, a name I am very familiar with in terms of her products as I stock several ranges in my shop.
Teresa was due to teach us two classes as well over the event.
My first impression of Teresa... beautiful long blonde hair, gorgeous smile that just lights up her face and OMG is she expecting to wear heels that high while teaching all day... and the answer was YES!!
Like Heidi, Teresa is incredibly open and forthcoming about her private persona. I certainly appreciated the openness and honesty as well as the story behind her designs and creations. I have to confess that I haven't really thought much about why I scrapbook other than the fact I enjoy the creativity as well wanting to keep a record of our life and events for future generations. So hearing Teresa's reasons for why she scrapbook's has certainly given me food for thought as to why I scrapbook and what I really want my scrapbooks to say.

Class 1 - Memories Layout:
In this class we created a two page layout using some of Teresa's "Memories" range. Right from the start Teresa was very insistent that although we were following her page design, we were more than welcome to change it or step it up however we wanted. As someone who NEVER follows a recipe this was somewhat of a relief to me... so I did!!

Once again the class was quite speedy, especially when for those of us who did extra things such as inking the edges of embellishments, that were outside of the page design. I was impressed with the explanations Teresa gave us about some of her page designs. Not only did she give us the "why" of the page design, but she also gave us a number of different ideas as to "how" we could then use the pages she had designed. This showed me that she had put a great deal of thought not only into the image design, but also how the pages and other products could be best utilised by the end user of her products.
Like all my other classes, I didn't get the layout finished and I definitely still need to add some photographs, but I was still pleased with the way the double layout turned out.

Class 2 - Far & Away Travel Journal:
This class was our final class of the event. Despite this, the enthusiasm level was still very high from all of our group. This time we used Teresa's Far and Away collection. I had one complaint about the kit and that was that one of the cardstock pieces wasn't cut well and I ended spending far too much time resolving this problem. Part of this was my being such a perfectionist and crooked lines and edges really bug me but I accept that sometimes when you are making kits in bulk there are going to be one or two bits that goes a little awry. It wasn't a big deal (despite the fact that is noted a comment in here) but it was a flaw in the otherwise great class.
Once again Teresa used her "this is my design, but change it up however you like" class structure. Although we were sent the photo requirements prior to the event, she did still offer alternatives for those who didn't have photos (like me) so you didn't feel completely out of place or unable to bind your finished project.
Again the class was a little rushed but that was because half of the class time was reserved for the binding of each of the journals. Although I didn't get mine bound there as I have my own binding machine at home, it was certainly essential for everyone else who was not so lucky to have the access at home.
The travel journal pages expanded out to see all the pages created. This includes a sheet of plain cardstock which I have not shown below as well as some of Teresa's mini file folders which we didn't do anything to, so additional photos have not been included of these either.
The front of the journal is supposed to be two photos backed on to each other... but as I didn't have any photos, this is for now the front page. I just LOVE the pack of bling - "Tell Your Story - Medallions". So totally gorgeous... I could have used a dozen packs of these!!
Very simple treatment but doesn't it just look so smart!
Page 2 -  the addition of the border strips just really finished this page off. More of the gorgeous bling. One thing that has come through from all of the classes is simple ways of adding extras photos onto the one page though the likes of mini file folders, openables and photo-flips and this page is no exception.
Page 3 - another simple to way to add lots of pictures without having to add a lot of extra pages or bulk; and very cute with the use of the ribbon to hold it closed. With these being pockets they are also ideal for holding some of all the memorabilia you collect while on your holiday. I love the variety and the number of borders included in the pack (we received a full pack which included 12 different borders).
Page 4 - pocket pages are perfect for mini albums regardless of the theme. You always end up with odd or unusual things that you want to keep but which you may not want to put any holes in and pocket pages are the perfect solution to storing these and keeping them within the album.
Page 5 - I love this as an alternative way of using up some of those journal block pages that so many companies are now including as a part of their collections. Rather than cut them all up into individual journal blocks, cut them into a larger block of four journal blocks and use this as a page.
Here I am still looking haggard while the lovely Teresa looks cool, calm and collected... yes I aspire to look this pulled together!!