Showing posts with label Off-the-page. Show all posts

Tuesday, October 29, 2013

Altered Coffin and Halloween Finery... and I'm probably going to sewing hell for this project!!

A week or so ago I stumbled across a cool channel on YouTube that someone I subscribe to had watched so now I have subscribed to follow myself. The channel is Serena Bee and you can find her on YouTube here.
The first video I watched was her Halloween Challenge and Giveaway for 2013. The prize Serena is offering is totally cool and packed full of Halloween goodies, but it was the challenge itself that attracted me. Either alter a miniature coffin or make a Halloween inspired ATC. I love making ATC's but the idea of altering a mini coffin was just too cool to resist so I set my mind to participating in the challenge.
And here was where I encountered my first hurdle...
Over in the US of A (where Serena Bee is based) mini coffins are available on just about every street corner... well at least in every Michael's store and at a measly USD$1.50. Here in New Zealand we don't have a Michael's (only the Michael Hill jewelry stores) so that option was out. I tried a couple of the larger craft stores to no avail either. I even checked the Amercian store here (Martha's Backyard) but not a mini coffin to be found.
What I did find and ultimately used, was a paper mache pencil case with straight sides and a flip up lid. It still does look like a coffin just not the generally accepted (and first to spring to mind when you think of a coffin) six-sided shape but the bonus was I could design it with a split lid which I could lift up for a viewing.
I painted the coffin (as I no longer think of it as a pencil case) inside and out with black acrylic paint. Then I sliced the lid in half to create the two independently open able lid portions. In hindsight, I should have done this before painting as the cutting process pulled off some of the paint, so a touch up job was required.
About now I pondered for a bit as to how I wanted to decorate the coffin. I bought some gorgeous green fabric and a spider and web pendant, neither of which I ultimately used. Instead I decided to add some flames along the bottom border of the coffin. (Although that sounds like a quick and easy decision it was actually more like a desperate clutching at straws as I didn't know what to do or where my mojo was hiding at the time.)
I checked out the flame related stencils I have but they weren't really designed as borders nor were they designed for such a small project. The height is only about 1.5" so I decided my only option if I wanted the flames was to design and create something myself.
I downloaded some stock images from the internet and used several images as inspiration for the design. I drew my design onto a strip of heavyweight plastic (cutting board or place mat from the $2 shop) then cut it out using my Tim Holtz Cushy Grip Scissors and Retractable Cutting Blade.

I placed the stencil along the edge of the painted coffin so that the base of the flames was the bottom edge of the coffin and pounced on some yellow acrylic paint using a cut up piece of makeup sponge. The design was quite detailed and some parts relatively intricate so I wanted a lot more control of what I was doing, hence the make-up sponge.
My conclusions on this step...
1. The image created by sponged on the paint was not as strong or as sharp as I imagined or wanted.
2. As the coffin was made from paper mache, the surface was actually that smooth, so achieving a crisp clear edge on the flames was not easy as the stencil did not always lie completely flat on the coffin.
3. Putting the yellow paint over the black was as you can imagine not a simple task and more than one coat would be needed in order to not end up with a "dirty" yellow look.
I thought about laying the stencil back in place and going over the image again with the sponge but decided this might just end up making a complete mess of things, so instead I decided to paint over the image by hand using a fine detail brush and using the stencil image as my pattern.
This turned out much better. Not only was the yellow paint completely opaque this time, but I was able to clean up the image and ensure that the outer edges of the flames were all much crisper and cleaner.
I repeated the paint job with orange and red acrylic paints ensuring that each subsequent layer of colour left some of the previous layer showing to give the flames a colourful and dimensional look. For the red in particular I made sure to use a "flicking" painting movement to give a softened edge to the image rather than a hard, unnatural look.
At this point in time I decided that I didn't want to cover up too much of the paint job having put so much effort into it and I also didn't want to just put a skeleton into the coffin. It was way too cool for that, but instead I thought the coffin would be more suited to a Vampire Doll who used the coffin as her hip and trendy "hidey hole".
I traipsed around Papakura and the surrounding area for the perfect doll. Ten or was it twelve shops later I still didn't have the perfect doll... though I did have a couple to choose from. I found there was a predominance of really tall "fashion" dolls and mermaids neither of which I wanted or really short dolls that would have just looked silly. The two dolls I did find were still both a little tall so some creative "plastic surgery" would be required to make them fit but at least the were a faux Monster High look so the doll I eventually chose was already a "Vampire" (all be it a pink one).
After some delicate plastic surgery my Vampire girl was about an inch shorter (just don't look under the clothes to see what I did in order to make her shorter... it wasn't pretty!!) and she now fits inside the coffin, all be it still a tight fit.
(Above you can see how much I shortened her in order to get her to fit.)
While out doll shopping I had also picked up a cushion cover to cut apart and use as the fabric to line the coffin with. This is something I have done in the past and is a much cheaper alternative to buying fabric from a haberdashery store. The cushion cover was only $2.00 from the cheapo store, yet gave me two generous squares of silk fabric in two different styles (and a zip I can use for another project).
I cut the fabric to size then completely cheated. If you are a sewer you might want to skip this bit. If you don't know how to sew then read on...
Time was of the essence and I couldn't be bothered getting out my sewing machine and hand sewing was going to take forever... so I cheated. To provide a crisp edge on the coffin lining and to ensure the fabric didn't fray (as fabric usually does) I folded each edge over and stuck it to the back of the fabric (wrong side) with masking tape. (Yes I know I am probably going to sewing hell... but tough, if I can live with it then so can you). No I didn't take any pictures... I hid the evidence of my evil doing!!
I then adhered the fabric in place using Helmar's Fabric Tac glue. It is worth pointing out that I did the inside of the base in one piece but the lid was covered in two pieces so that the two portions of the lid could be opened independently of each other with a nice crisp edge along the centre split of the coffin lid.
The then hand sewed a coordinating outfit for the doll. She is dressed in a camisole style top made from black ribbon of two different widths and a orange and black skirt. Both the skirt and camisole are decorated with a frilled black lace to accent and provide a feminine touch. In addition the skirt is lined with a black tulle under petticoat though both layers of the skirt have been tacked together so that the skirt doesn't flare about too much preventing the coffin lid from closing properly.
The doll originally wore some red plastic filigree boots with slipped on her lower legs. I coloured these black with a permanent marker so they now are black with a red undertone which looks really good against the orange lining.
The final touch was some black ribbons in her hair before I laid her to rest in her new home.
I love the look of this project. I am so pleased with the way everything turned out especially the flames on the outside. It take a lot longer than I thought it would but that included sourcing the coffin, fabric and doll as well as all the hand sewing of her outfit, not originally included in my planning phase, but that said... I really didn't mind to get the end result.
Now I just need to keep it away from my 4 1/2 year old Granddaughter who has been eyeing up a new doll for her extensive collection!!

Tuesday, October 8, 2013

Swap Video - Artistic Creations - Mini File Folders

Quick share of a video I have recently posted on YouTube of a swap I hosted on Artistic Creationz.
For this swap we made Mini File Folders.


Thursday, August 1, 2013

Lindy's Stamp Gang Color Challenge

About a month or so ago I ordered some new products to my store in time for the SENZ Craft Show. I had heard only good comments about the Lindy's Stamp Gang Mists from those in the know, so I ordered some having only ever seen them on YouTube videos.
Having tried them at SENZ and on some projects I have created since, I can now honestly say that I am definitely a convert to Lindy's Stamp Gang and so much so that I am applying for their design team because that is how much I love the products. For more information about applying for the Lindy's Stamp Gang Design Team you can check out their blog post here.
In order to apply for their design team we have been asked to participate in this months "Color Challenge" on their blog (blog post here). And anyone can enter their Color Challenge - just entering the challenge puts you in the running for some very cool Lindy's Stamp Gang Products.
This is the first Color Challenge they have run but it is certainly not going to be the last. Be sure to follow their blog and keep an eye out for this image for the next Color Challenge. (I'm used to spelling it as "Colour" so need to double check every time I type it LOL)
The rules are pretty simple...

1. Help spread the word about the Lindy's Color Challenge - done and with pleasure! The more people that enter each month's Color Challenge - the more giveaways they will giveaway!
2. Use Lindy's Stamp Gang Products - done! If you don't have any Lindy's Stamp Gang products then you can buy them from my online store at www.scrapfx.co.nz. Look under "Essentials" for their products.
3. Use a minimum of two colours in the Color Challenge (see the image below) - done!
4. Link the Lindy's Stamp Gang Products to their store - done (well will be by the time you are reading this)!
This month's challenge was these colours...

For this challenge I altered a key holder I had purchased at a discount store.
I white washed the entire item, inside and out, with watered down white gesso. While the gesso was still wet, I then dabbed it with a paper towel to add some depth by making the white wash less even and to allow the wood grain to show through better.
I then adhered some K & Company "Citronella Waves" patterned paper from my stash, inside to cover the back wall of the key holder. In this top picture (taken without the flash) you can see some of the swirling waves (if you look closely enough) but you can't see any of the glitter accents and the colour looks a little darker than what it is in reality.
Around the outside I adhered some red patterned paper - source unknown - also from my stash. It was just the perfect colour to coordinate with the red I had used for my flowers... and I love red so it was the obvious choice.
In the picture below... same angle but with the camera flash, the colour is closer and you can see the glitter reflected in the glass door but you lose the waves pattern... I think I need to work on my photography skills!!
I stamped onto the paper for both sides with VersaMark Watermark Ink using one of the Hero Arts Mixed Design Border acrylic stamps then sprinkled on Lindy's Stamp Gang Embossing Powder in Angel Wings Ruby. This is a clear embossing powder with a red shimmer. When stamped onto the red paper I had chosen for the outside of my altered key holder, the heat embossed image really took on the red of the paper, though is accented oh so beautifully by the red shimmer as well. Below are pictures taken without and then with the camera flash, as well as a close up of the embossed image showing off that beautiful shimmer.


I took some close-ups to help you see what I had done (and see that patterned paper a bit better). It's just gorgeous and I so wish it showed up better in the pictures!!
Bottom cluster of flowers but this time with the flash - now you can really see that paper and some of the shimmer on the flowers as well.
In this picture and the one below, you can see where I really went to town with my Lindy's Stamp Gang mists. All the flowers started out as plain white flowers... either dimensional roses from I Am Roses (yes you can get them from my online shop) or flat Bree flowers from  Ada available in my shop here.
I used a number of Lindy's Stamp Gang mists to colour my flowers (and some non-Lindy's for colours I didn't have), but all flowers feature Lindy's Stamp Gang Starburst mists on them.
To colour the flowers, I misted them all generously with water first. I misted my chosen colour onto my craft mat then using my water brush I gently dabbed each colour along the edge of the flower petals. As each of the flowers is made of paper, they quickly soaked up the colour despite being already wet. Being so wet actually aided the spread of the colour and enabled the colour to dissipate to give quite a natural look.
The light blue flowers were painted with Lindy's Stamp Gang Tiffany Lou Blue (though mine is under the old name of Tiffany's Blue) and then I misted them once they had dried with Lindy's Stamp Gang Teeth Chattering Teal.
The dark blue were painted with Tattered Angels Glimmer Mist - Night B4 Christmas and accented with Lindy's Stamp Gang Twinkling Tinsel misted generously.
The red flowers were painted with Tattered Angels Glimmer Mist - Lobster or Luminarte Radiant Rain Color Concentrate Poppy Red and were accented with Lindy's Stamp Gang Frostbitten Fuschia.
The white flowers were all left plain but were misted with a combination of Lindy's Stamp Gang mists in Creme Brulee Cream (I love this name!!!); Frozen Jack Frost and Don't Eat Golden Snow (another great name for a color).
For all my flowers I was sure to use "The Gripper" a fabulous tool that enables you to dry or heat emboss with your heat gun (and we all know how much I love my heat gun) but without the risk of burning your fingers. Once again I love this tool so much... you can find it in my online store.
Once the flowers were all coloured and dried I then selected some to curl the stems on for a little pop of something something then I adhered the flowers all in place using Helmar 450 Quick Dry Adhesive. As I have said before... this glue is like a glue gun but without the burnt fingers!
I really, really love these products from Lindy's Stamp Gang and as I mentioned I am a convert. I will continue to grow my stash of mists and increase my colour range and you can be sure I will share them with you. 
All the colours I used on this project were from the Starbursts range of mists from Lindy's Stamp Gang. To see a project I created using the Moon Shadow Mists also from Lindy's Stamp Gang be sure to check out this blog post - Book of the Undead. The title might sound a bit suspect, but I know you will love the grungey look of the Moon Shadow Mists as much as I do. 
Be sure to follow my blog to keep up with any more projects I create with not only the Lindy's Stamp Gang Mists but also their embossing powders, Magicals and stamps.

Monday, July 29, 2013

Book of the Undead

If you have been following my blog or even just looking back over previous posts, you will have seen a few posts on my step-daughter's Zombie themed 21st birthday.
In this post I wanted to share the mini album I created for her for one of her presents. Her main present from her Dad and I was going to be a little late, but I wanted her to have something from us on her birthday. In the past it has become standard party practice for us to pull out a visitor's book for everyone to leave us a message, but this time I decided to create something that was personal to her and that went along with the Zombie theme.
We gave it to her earlier in the day and then left it out at the party so that family and friends could leave a message in it for her. We will print out some pictures as well and then she can add these to her book along with any cards or other memorabilia she wants to keep.
The book includes three signatures of five leaves of Kraft carstock (10 double sided pages per signature) bound and stitched with bakers twine. I held the three signatures together by entwining the tails of the bakers twine in the spine as well as adhering them together with structure strips that I usually use in any construction pieces I make.
The cover was recycled cereal boxes covered in Kraft cardstock. I thought about using chipboard but settled on the cereal boxes as I wanted the album to have a flexible cover almost like a soft cover Moleskin journal as this would give it a more aged looked quicker.
I decorated the front cover with letters cut using the Cuttlebug "Olivia" alphabet dies. I ran all the letters through my Xyron 150 to make them self adhesive - my tool of choice for anything like this as I know they are guaranteed to stick without fail!! Once they were adhered in place to form the title "Book of the Undead" I smeared a light layer of Atelier Modelling Compound around and over some of the letters.
The back cover I also smeared with a thin layer of the modelling compound with my palette knife, then I used the end of the blade to dig scratches down the length of the album as if it had been used as a shield against attacking Zombies.
Once the modelling compound had dried I generously coated the cover all over with Lindys Stamp Gang Mists.
I used - Starburst Set - Sweet Treat - colours - Cadbury Milk Chocolate and Dark Chocolate Truffle; Starburst Set - Haunted Halloween - colours - Hags Wart Orange and Screamin' Banshee Black and Moonshadow Set - Blue Label - colours - Long Johns Silver, Golden Doubloons, Jolly Roger Red and Crow's Nest Copper.
I used the colours generously across the cover in patches of colour for texture. In some areas one colour was lighter than another and in some areas I purposely over-sprayed to create areas with drippage. The drips of blood were created by dripping Lindy's Stamp Moon Shadow - Jolly Roger Red mixed with Dylusions Cherry Pie Spray Ink.
I carried the blood drips into the signatures inside as well as adding some "blood" spatters on the odd page through the journal.
To finish off the cover I edged the spine and both covers as well as lightly accenting the die cut book title with Tim Holtz Distress Inks in Vintage Photo and Walnut Stain.
To add the pages throughout the journal, I distressed the edges of each page (quite vigorously) with my Tim Holtz Distressing Tool and Tim Holtz Tonic Scratcher Tool. I then applied generous amounts of watered down Tsukineko Walnut Ink and Terra Cotta Antiquing Solution which I left to air dry overnight and the next day. (I applied so much that the signatures were actually sitting in a pool of excess liquid which soaked up into the porous pages through the distressed edges over night).
Once everything had dried and the signatures were adhered inside the cover, I stamped images throughout the journal using various stamps... most of which were my recent purchases at SENZ. You can see more of them here. I then added a generous supply of journal blocks and tags which I had printed out from a number of digi-printables websites. These included Ephemeras Vintage Garden, Prima Marketing and How to Haunt Your House (Dot) Com. All images used were "freebies".
I really loved the end result so much that I could have quite easily kept it for myself. I did giver her the album, but may just have to make another one for myself.
Two versions of the front cover - taken with and without the camera flash. The picture above without the flash, shows more of the detail of the lettered and depth of the colour but the picture below taken with the camera flash just shows off all the brilliant luminosity of the micas in the Lindys Stamp Gang Mists and is probably a more true reflection of the actual colours. It shows the more "leathery" look the journal cover has.
This time the back cover with and without camera flash. Same as the front cover, more detail above, but more shimmer and a truer colour with the flash. The bottom picture also shows the "scratches" more clearly.
Just a couple of the pages from inside the journal. You can see the dripping blood above. The intense red from the Dylusions Ink Spray blended with the shimmer and depth of the Lindys Stamp Gang Starburst Mist to give me a really fabulous looking red blood which just stood out from the Walnut Ink and Kraft Cardstock.
This page really shows the beautiful distressing and aging I was able to achieve from the watered down Walnut Ink and Terra Cotta Antiquing Solution. I love the "water stained" look combined with the drippage, blood stains and stamped images. And then the printables images all fussy cut and edged with Tim Holtz Distress Inks just finish the book off.
Sorry only a couple of pages, as I only finished the morning of the birthday party... so didn't have much time for photographing it. I did take a video of it, but I'm not sure how clear that turned out as I used my web-cam. I'll add a link to my YouTube channel once I have posted the video.

Sunday, July 28, 2013

Zombie Cakes??

I know it's not strictly crafting is the paper crafting sense of the word, but this week I have been creating with flour and eggs and stuff... well more specifically pre-prepared frosting and a box of cake mix... did I mention I'm not really a baker??
This weekend is my step-daughter, Alysha's 21st birthday and she asked if I would make her birthday cake. As I mentioned in a previous post the theme for the party is "Zombies" so it had to be a theme appropriate cake design.
I trolled the internet for a few weeks and came up with some ideas of what I could potentially "attempt" to create.
Then when I was a SENZ I spoke to the lovely cake lady on the Absolutely Crafty site about my ideas and asked for some product suggestions. She suggested some GoBake Easy Frost and Flavacols with some Satin Ice Fondant. Being the experienced baker I am (NOT) I took in everything she said, bought what she suggested and went from there.
So here is the end result...
And with the candles added...
The cake was made in two pieces... and is two different types of cakes.
The "Tombstone" is a rice bubble and marshmallow cake - the "in thing" for cake toppers so I'm told. I made the rice bubble cake in a shallow tin and left it to set for an hour or so.
I cut the cake to shape and lopped off the bottom at an angle so it would automatically lean to one side as if the tombstone had been disturbed.
While it was setting I blended some white and black Satin Ice Fondant to get a marbled grey colour which I rolled out large enough to completely circle the entire rice bubble cake.
I then added some more black fondant to make a darker grey fondant to make a very poor "RIP" for the front. I then left this to dry for a couple of days, turning it over once to allow the back of it to dry as well.
The next day I made the second part of the cake. I bought a Betty Crocker Devil's Food Cake Mix which came with a prepared chocolate frosting, so made it up according to the instructions on the packet. I baked it in the same pan I had used for the rice bubble cake so that I knew they would be the same size.
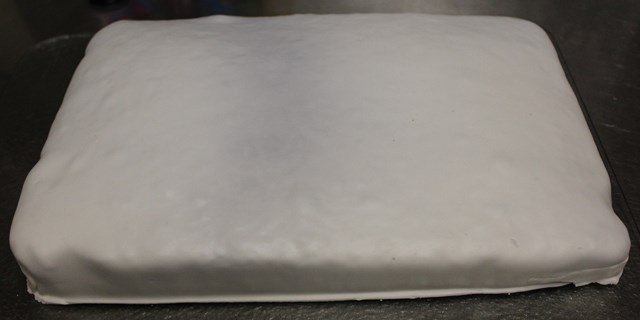
I rolled out some more of the Satin Ice white fondant and layered this over the chocolate cake.
Then I made up the GoBake Easy Frost mix I had bought at SENZ and added icing sugar and some green food colouring to colour it for the "grass". I tried not to blend the colour too much so that I would get some variations of green for the grass but when I piped it onto the cake that it all blended anyway turning from this vibrant green to a mushy pea green.
I piped the grass around the sides of the cake then started up onto the top of the cake as well. After a couple of loops of the top of the cake, I sliced the fondant down the length of the cake in a zig zag pattern and piped frosting onto individual pieces of fondant. I then folded back the pieces of fondant over itself leaving exposed chocolate cake in the centre. I repeated this step for the entire cake.
I spread the prepared chocolate frosting that came with the cake mix over the exposed cake as well as the "inside" of the peeled back fondant for the exposed dirt from the Zombie escaping the grave site.
To finish off the this bit of the cake, I lightly sprinkled milo powder over the chocolate frosting as well as a little sprinkling on the grass as if it was bits of dirt that had been spilled out.

Overnight I left the cake on the bench, though had to get creative to keep the cats and any sticky fingers from touching the cake without ruining all my hard work...
The morning of the party I put the two cakes together and then added the final touches. Some drops of GoBake Raspberry Flavacol to look like drips of blood and the candles.

I couldn't resist adding these candles as well as the "21" candles... they were just too perfect!!
My step-daughter loved the cake and that was all that mattered. It didn't taste too bad either.