Friday, May 31, 2013

Creative Adventures Downunder - Part 3

Now we are getting down to the good bits... the actual classes.

My first class was with Maggie Armstrong a tutor from here in New Zealand. In Maggie's class we created a "Creative Adventure Commemorative Layout" with a little bit of mixed media Kiwiana thrown in for good measure.
We had 3 hours to create this layout which sounds like a lot of time, but really, really isn't in a class room situation. This is my still to be completed layout... but I wanted to share (publicly) what I was able to achieve in class at the time. I will finish the layout (especially some fussy cutting I managed to get half done during class) and post a picture of the completed layout once done.
Note:
1 - My little camera charm fell off. It is supposed to be attached to the grommet but it decided not to cooperate so I need to re-attach it.
2 - I didn't get my photo taken at the photo-booth at the dinner on Friday evening. Too many people, not enough time, but I will find a picture to add to the pull out photo mat which is hidden inside the camera. I also need to add a paperclip or turning mount to keep the camera in place (it flops down otherwise, by design).
3 - There is some fussy cut flowers and scrolls to be added, a chipboard logo for CAD and some more feathers as well.
Close up of the mixed media detailing we added with the paua shell and feathers. Can I just add these a really teeny tiny pieces of paua and they were not  easy to work with which is why I think I fell behind in class... but they still look really good!
This part was definitely my favourite. We learnt a new technique and tried out a new product (that I had never used)... melted bees wax with Perfect Pearls over a wooden laser cut word.
I really enjoyed this technique, so have bought some extra bees wax to try this technique again in my studio, so I will post a tutorial on what I create.
The delightful Maggie Armstrong and myself. (And yes she was bending so as to not look so tall next to me)

Thursday, May 30, 2013

Creative Adventures Downunder - Part 2

Rather than overload you with my glowing about the Creative Adventures Weekend, I've decided to split is up into segments... hence part 2. You can see the introduction in part one here.

Somewhere in all the pre-event discussion it was suggested and then decided that as an optional extra, those who wanted to could make ATC's (Artist Trading Cards) for swapping/trading with other participants over the weekend's events. As I had time on my hands I decided I definitely wanted to join in.
Around this same time, a discussion took place in Facebook about the anticipation that everyone was feeling leading up to the event... which inevitably lead to a discussion about the Rocky Horror Picture Show (yes I may be showing my age here) including links to clips on YouTube and various comments about who attended what shows and who went to the midnight screenings all dressed up in costume.
I took my lead from this discussion for the theme of my ATC and I created...
 I made 144 ATC's all of the same design but all of which looked different. Here is just a sample of the finished ATC's.
 The front:
I worked out I could make 12 ATC's from a 12" x 12" sheet of cardstock as each ATC needed to measure 3.5" x 2.5". The base was Bazzill Kraft Cardstock. I then adhered torn strips of Bazzill "Antique Sheet Music Paper". I coloured the entire back ground using Ranger Industries Tim Holtz Distress Inks in Antique Linen, Fired Brick, Aged Mahogany and Black Soot with my Foam Ink Applicators. I spritzed them generously with water to blend the inks then dried them off with my trusty heat tool.
I misted the backgrounds in patches with Tattered Angels Glimmer Mist - Lobster before trimming the backgrounds down to the individual ATC sizes.
I stamped each ATC with a "Kiss" stamp I picked up second hand on TradeMe and embossing ink then sprinkled them with a Red Glitter Embossing Powder which I have had in my stash for probably 8 - 10 years. (Source unknown). Once heated to emboss in place, this still gave the lips a glittery look, perfect for the theme! (Yes I had to do this 144 times!!)
I printed from my laptop onto cardboard the sentiment "I see you shiver with anticipation!" the infamous line from Frankenfurter. I hand cut these out for a distressed uneven look, then applied Ranger Industries Tim Holtz Distress Inks Black Soot directly to each sentiment. 
The final step for the front was to hand pierce then hand stitch cross stitches along the edge of each card. These were my homage to the laced corset that Tim Curry wore as Frankenfurter for most of the movie.
On the back of the ATC (mainly to hide my stitching and any over inking marks) I adhered a ATC summary as shown above. This listed the Series and name as well as giving all my contact details. You can also see that each card was individually numbered and signed.
Throughout the event I managed to trade some of my ATC's with other participants as well as giving a whole lot to those who hadn't made any. (I made enough so that everyone would be able to get one). Above are the ATC's I traded with some of the talented people at CAD.

Wednesday, May 29, 2013

Creative Adventures Downunder - Part 1

I have been waiting for this event for six months.
At first it seemed like it would never get here. It was months away. No need to worry about it, just keep it somewhere in the back of the mind.
But then it was very soon and very nearly here and the time just seemed to be full of anticipation that it would be here.
And then it was the week before and time to get organised, pack and suddenly it felt like it would be here too soon and I wouldn't be ready and I needed more time...
And now it's over.
But they have announced there will be a 2014 version so I have that to look forward to now.

Until then and while I am still surrounded in the glow and happy feeling of a weekend full of crafting and spending time with like-minded people, I want to share with you some images and thoughts about the weekend.
It started officially on Friday 24 May 2013, but for those who were in Auckland and available could go through the registration process on the Thursday afternoon instead of rush through it all on Friday morning (at 8.00am - who's idea was that???). As I was available and had the time and so I could check out where I had to go and what the parking was like, I rocked up Thursday afternoon to complete my registration and check out the lay of the land.
There were a few others with the same idea. Some were local (Aucklanders) but there were a few who had come in from out of town or from overseas early as well. We checked in our name, received our name badge and group allocation (pink, red or orange), picked up our pre-ordered goodies, did a little extra shopping if we were so inclined and then were given a goodie bag of items donated by the generous sponsors of the event.
I was stagging it (didn't go with anyone else in particular) though did meet up with some friends that I made online during the lead-up process. They ended up in the orange group... and I was in the pink group. (As it always ends up).
I resisted the urge to check out my goodie bag until I got home, though it was very tough to resist!! Look at all the amazing goodies we received. The Cappuccino and 6" x 6" paper pack were given to us at the dinner of Friday night, but everything else along with our timetable and last minute updates were all included in the bag. I have to confess that I did remove things from the bag before taking my photograph, but hopefully I managed to get most if not all the things back together for the photograph.
We received...
Bazzill Basics "In-Stitchz" bag to hold everything in with a lovely blue ribbon around it so they all looked pretty. Bazzill "Just the Edge" Cardstock Stripes - mine are black with embossed spot - 12 pieces, 2 of each. Bazzill clear gemstones and a bag of "Punctuation" die cut chipboard also from Bazzill.
Pair of 8" Orange Handled Scissors from Fiskars.
Inkessentials Glossy Accents 18ml bottle from Ranger Industries.
Permanent Adhesive Glue Stick from Xyron. This has a curved edge as well as a corner so is a very interesting design.
Teresa Collins washi tape - grey with globes on it.
Clear mist bottle and a wooden block with velcro to attach felt ink blending pads (some were included). These were both labelled with the CAD logo. The wooden block had the logo burned into it - a detail I loved.
KaiserCraft file set.
Mini flowers in burgundy, cream and mauve.
Some wrapped lollies and a chocolate bar, which unfortunately did not make it through the weekend alive!
I hope I managed to capture everything there, my apologies if I didn't. This was a fantastic goodie bag with lots of useful items for the weekend of crafting and beyond. Thank you so much to all the sponsors who donated the goodies and for the organisers for preparing the bags for us. I know we all appreciated your generosity!!


Tuesday, May 28, 2013

Happy Mail

A week or so ago I received a strange email which at first glance I thought might have been spam or an attempt at sending me a virus or the like. It was a notification from the US Postal service that my parcel was in the post and here was the tracking number so I can check on progress. Given my current tight financial situation and the fact I haven't whipped the credit card out for some time I was a little dubious at first... one might even say suspicious. I very nearly blocked it and sent it straight to the junk folder never to be seen or heard from again... but I hesitated. The sender's name didn't look that suspicious, I mean it was quite a nice name and had connotations of a possible link to something crafty, so I figured I would do some digging instead.
I googled the sender's name and then also searched it in Facebook as Google was being difficult at the time. Low and behold there was indeed a company page on Facebook and I had liked the page (definitely a promising sign). When I scrolled down a little there was a message announcing the winners of a competition the company had run on Facebook. Well colour me surprised when I discovered my name as one of the four lucky winners.
Long story short, I entered a competition on Facebook run by Heartfelt Creations (a US Scrapbooking Company) and I was selected as one of the four lucky winners. The prize... a full set of their about to be released collection "Sun Kissed Fleur" worth over USD$180.00!!
Needless to say... I then waited somewhat impatiently for my parcel to arrive. While waiting I sent a heartfelt thank you to the company via email, as well as on their Facebook page and then I went looking to see what the prize consisted of. A few YouTube videos later as well as a look at their company website and before I knew it, my not so mystery parcel had turned up.
I've made a video of the opening of the parcel so you can see that on my YouTube channel shortly... (I will edit and add the link when it's there)... but for now here are some pictures of these wonderful products which I will be christening over the upcoming long weekend (if not before).
WOW - Look at all that crafty goodness. This is the complete "Sun Kissed Fleur Collection" the latest release from Heartfelt Creations. Their website is http://www.heartfeltcreations.us/
The 12" x 12" Paper Collection Pack. You can see all the pages (both sides) in my YouTube video. 
The paper is a very nice quality, heavyweight, textured paper and the colours are so intense and vibrant despite being a muted colour palette. I think the designs are ideal for both masculine and feminine pages so would be perfect for a layout for a couple.
The pack consists of two sheets of every design including the tags page and the 3" x 4" journal block pages both of which can be used as whole pages or cut apart.
The two Spellbinders Dies included with the collection.
 More on this die later... but wow... it cuts 12 flowers at once!!
Cut four of this die, adhere the lacey side edges together, then interweave the top and bottom flaps for a totally adorable gift box! I will make some examples so be sure to check back on the end results! 
 Can you believe this?? SIX sets of rubber stamps...and all coordinated!!
 Tags and background stamps.
Clusters and corner/borders .
Two sets of flowers.
But wait... don't they look vaguely alike??
Why yes they do. The set to the left has a textured/shading look when stamped, while the set to the right produces flowers with stripes. 
But why are the flowers exactly the same shape and size I hear you ask...
The two stets of individual flowers are designed to be stamped images which are then die cut with the coordinating die plate. So one press of stamp for 12 flower images and then one pass of the die through your die cut machine and instantly 12 stamped individual flowers ready for colouring and shaping into 3D flowers for your layout or project. 
Now doesn't that sound exciting. Guess what I will be doing over the long weekend!! Flowers, flowers everywhere I am predicting!!
Once again I want to publicly share my gratitude to Heartfelt Creations for their generosity. This collection is beautiful and will definitely be used in my crafting. Thank you so much for the opportunity. I can't wait to get all your products out to finally start to craft with them.

Saturday, May 25, 2013

Fifty {Two} Shades of Grey - Week 21

This week and the next two week's photos are all related. They are all different parts of the same "beast". It's quite small, you can hold it in the palm of your hand (well if you have small hands like me, then your hand) and though there are many, many makes and models of this item, this particular unit performs the function it was designed for, for three different options. Does that sound as confusing and nondescript as I was trying to make it sound??

It is of course a battery charger. This unit has the ability to charge 9 volt, AA and AAA batteries here in New Zealand.This is of course where I would charge up 9 volt batteries and though I've never actually recharged 9 volt batteries with it, the other two types give it a regular work out. With the number of things around my studio, let alone the rest of the home, that require batteries to operate, this is considerably cheaper than always having to buy replacement batteries. Thank you to whoever invented them!!

Wednesday, May 22, 2013

Creative Adventures Downunder

I've been more than a little distracted the past few weeks as I have a HUGE scrapbooking/crafting event coming up... well the first of a couple really.
This coming weekend is the Creative Adventures Downunder weekend and I have been hanging out for this for the past six months or so and I can't believe it is nearly here.
This is going to be so HUGE... so amazing... and I'm lost for words...
I have two and a half days of non-stop classes with... wait for it...

  • Heidi Swapp (US)
  • Donna Downey (US)
  • Teresa Collins (US)
  • Maggie Armstrong (NZ)
It is just going to be crafting heaven for the 130 odd people attending the classes.

There will be six classes starting 9.00 am Friday morning and running through until Sunday midday. They include:

  • Inspirational Journal - Donna Downey (Mixed Media Art Journal)
  • Memory File and Shadow Box with Layout - Heidi Swapp
  • Travel Workshop and Memories Workshop - Teresa Collins (Mini Album Class and Layout Class)
  • Mixed Media Layout - Maggie Armstrong
And then there is the Mix and Mingle and Carnival Dinner on Friday night.
There is going to be an ATC swap for anyone who wants to join in, as well as some competitions for some totally amazing goods that have been donated.

I will add some pictures of my ATC's tomorrow... I've made 144 of them!!! And you can be sure I will definitely be posting some pictures of the the weekend including the completed creations from all the the classes.
I feel so incredibly blessed to be able to attend this event and I look forward to being a sponge and soaking up as much inspiration as I can from these talented ladies, not to mention all the wonderful crafters who will also been in attendance.
I'm so excited, I'm not sure I can sleep!!

Saturday, May 18, 2013

Fifty {Two} Shades of Grey - Week 20

Doesn't this look cool... it should be relatively easy to pick what it is as well.

If you guessed a coil of 28 gauge bead wire, then you were correct. I just love the way the light hits all the different rings at slightly different angles... of course that didn't make it easy to photograph!!

Saturday, May 11, 2013

Fifty {Two} Shades of Grey - Week 19

Some people may know what this is straight away but others may struggle picking it. No it's not a colander / strainer depending upon what part of the world you are from.
If you are a crafter you may know what it is but only if you like hand sewing.

It is of course a stitching template, well part of one, for piercing holes for hand stitching on layouts and projects. It is definitely well used as evidenced by the scratches from my awl across the surface.
I bought this one on our local online auction website, TradeMe, having never sewn on a page before. It has become an often used tool especially on layouts, though it recently got a work on on the ATC's I am making at the moment. (More on them later)

Wednesday, May 8, 2013

Fifty {Two} Shades of Grey - Week 18

A couple of days late, I know, but I was busy crafting and participating in the (Inter)National Scrapbooking Day.

I love the close up here, it looks like the grooves on a record... anyone remember those or am I showing my age?
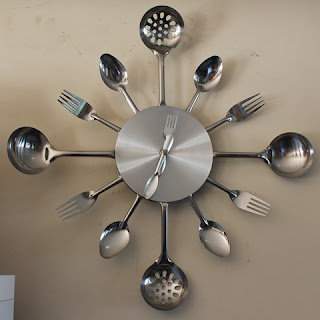
In reality it's this really cool clock that my darling husband bought me for an anniversary gift.
It was supposed to be for my studio, but there is a distinct lack of wall space as most of it is covered in stock or cupboards or windows... so instead it is now on our lounge wall. I love it!!