
Paper Bauble Ornaments
Firstly an apology for this post being late. Yesterday was a gloriously sun shiny day and I got caught up in a water fight between my kids, then spent the rest of the afternoon baby sitting my granddaughter who wanted Nana - Sonia time and I just couldn't refuse.
This meant today's craft was a bit quick and easy, but we all need days like that sometimes.

- Trim 12 strips of paper to measure 2cm x 14cm and make a hole approximately 0.5cm from the end on both sides of each piece. (After making this I would suggest using only 10 strips or making the strips a little narrower. As the picture shows the gaps are not that big when you follow the instructions.)
- Holding both ends together, poke a brad through a 10cm length of ribbon.
- Take one end of the first paper strip and thread it onto a brad. Repeat this until all the strips are in place, then open out the brad to secure in place.
- Do the same thing with the holes at the other end of the paper strips, then carefully separate the strips of card until they form a ball shape. (This step was easier said than done and required a little effort to separate them without buckling the paper, but once separated from the bundle of strips, rearranging them was an easy task.)
- Highlight your patterned paper with Kindi-Glitz for some extra Christmas "bling".
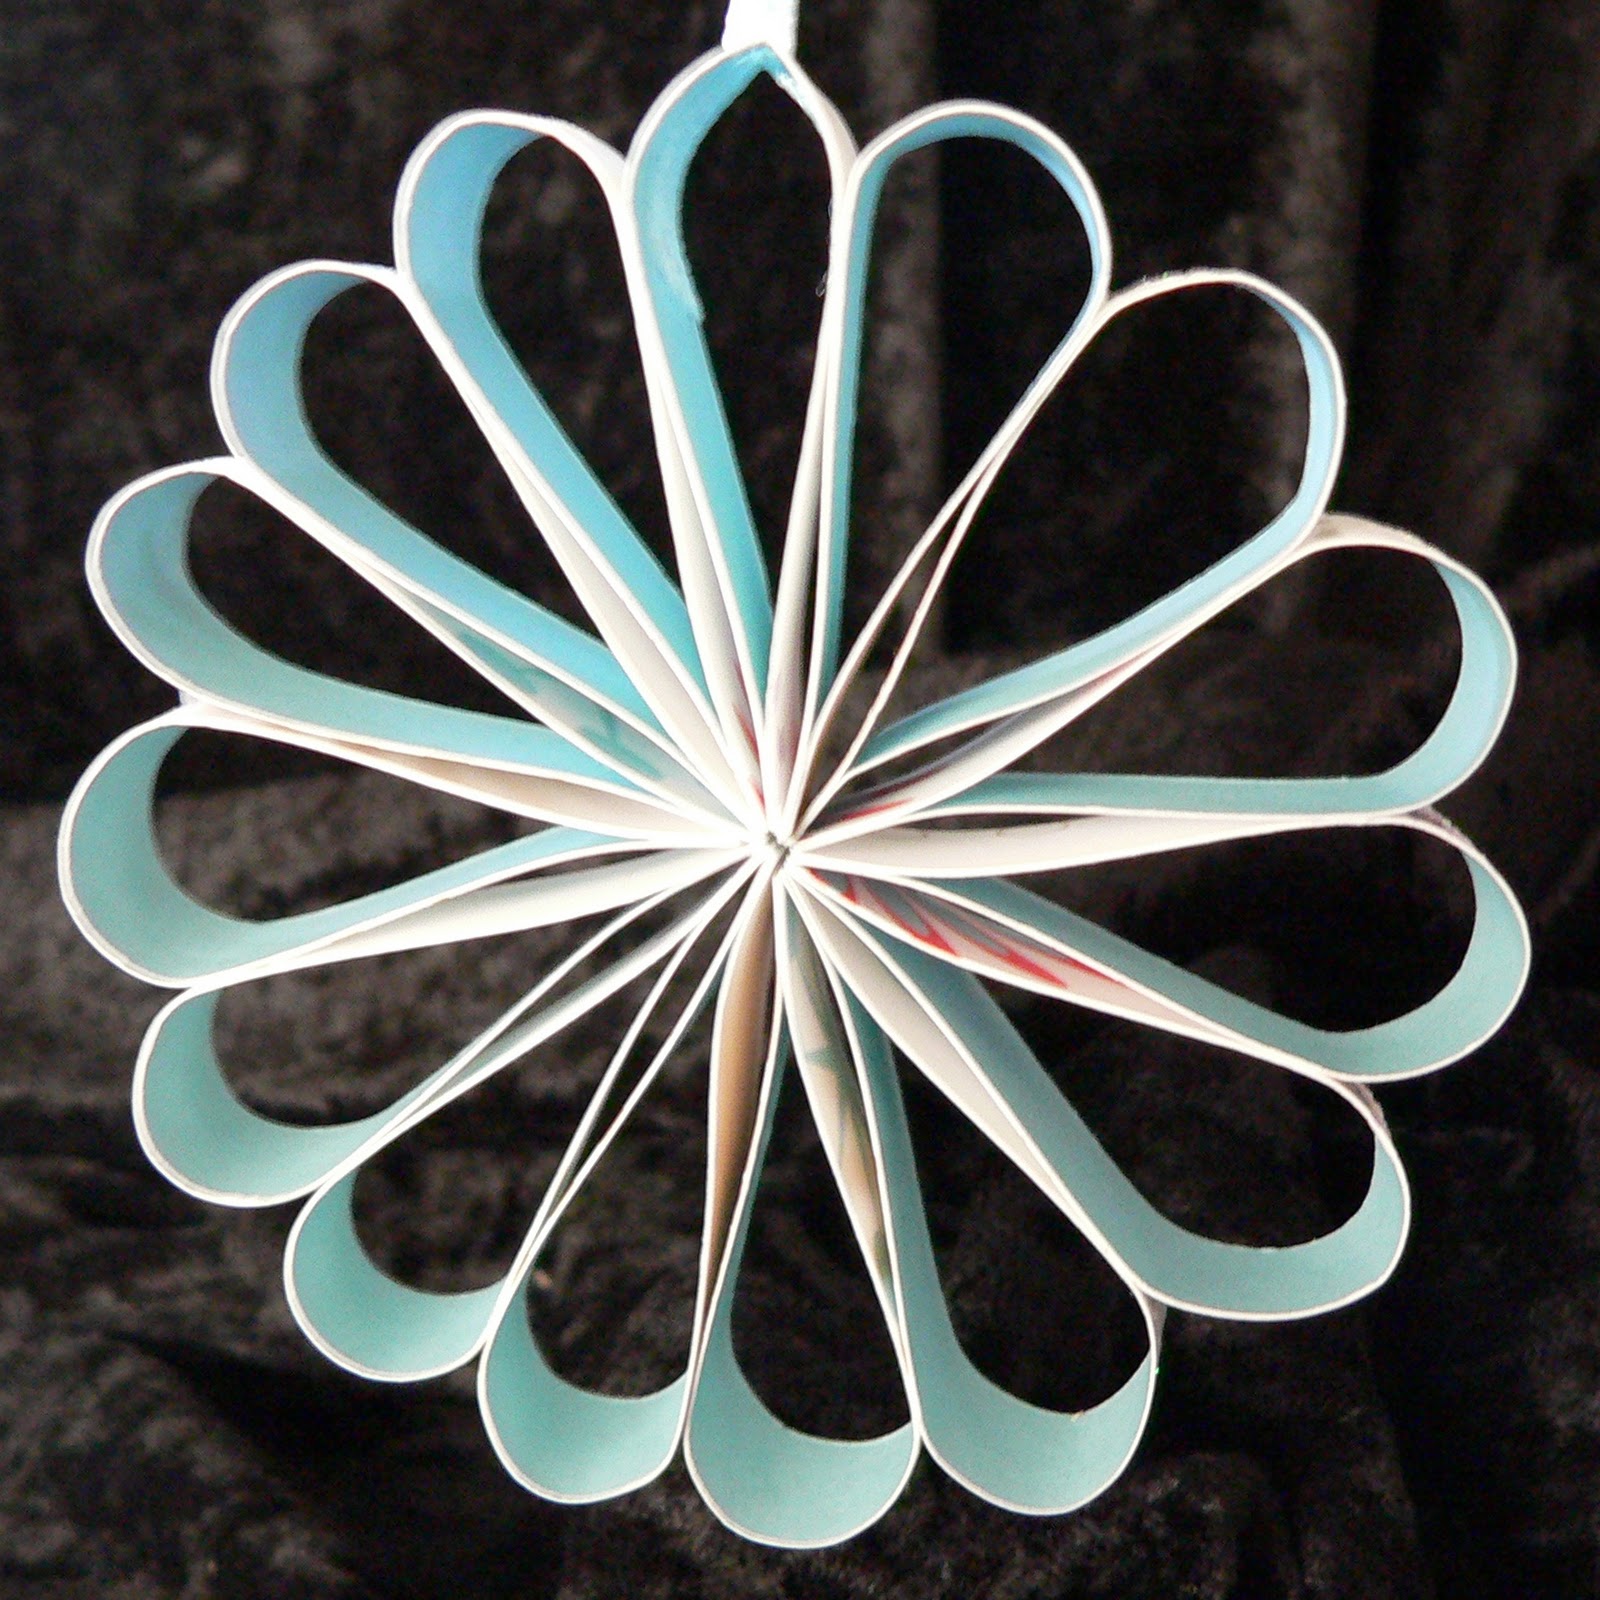
- Trim 15 strips of paper each measuring 1.5cm x 10cm and make a hole in the centre of one of the strips. I used my Crop-O-Dile punch.
- Take a 10cm long piece of ribbon and thread the two ends through the hole before securing them in place with double sided tape.
- Carefully bend each of the strips and tape them together with double sided tape at the end only to form 15 tear-drop like loops.
- Stick each of the tear drop loops together with double sided tape to form the decoration. I placed a short length of double sided tape at the widest part of the loops only to join them together.
- Decorate with Kindi-Glitz if desired.
No comments:
Post a Comment